


By Eugene Struthers


What is the histogram? And should you use it?
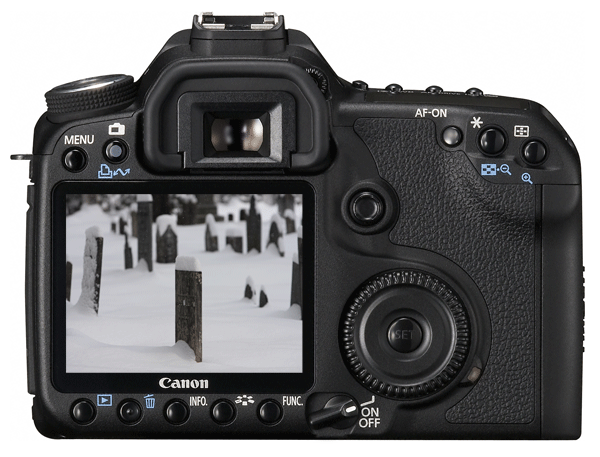
The modern digital camera has the ability to evaluate an image and tell us if it was captured with a proper exposure. It does this by using a histogram, which is a graphical representation of the light levels within an image. Broken down into the tonal range of light levels and there colour intensity and the number of pixels per each level, intensity and colour spectrum.
Definition: “Glamour-photography definition” The histogram is a graphical representation of the tonal range, colour and light intensity of each pixel within your image. It indicates the true light levels and intensity as captured by the camera’s sensor.


The histogram gives an indication of our exposure levels for a particular lighting condition. And it serves as a guide for the photographer to obtain maximum exposure within the camera. The main reason why a new photographer should start to use the histogram is based purely on the easy at which they will be able to instantly get an overall indication of the lighting conditions present in their images. Put simply, if you are only looking at a preview of an image to gain an insight into whether or not the image is correctly exposed. You will be missed lead. And there are six main reasons why just looking at the image on the back of your digital camera could give you a false indication of your exposure levels and light intensity. These are:
-
The Image which you are previewing is that of a JPG. A JPG basically means that all the data- pixel information, the colour tonal range is compressed according to the presets of the digital camera internally. This compressed data can be miss-leading as it applies its own presets to the image for the photographer. JPG preview images are in most cases slightly off from the true lighting conditions captured by most photographers. Whilst a RAW image is uncompressed data and the photographer can apply his own presets (editing) to a large pool of data pixel information, tonal range and colour intensity. It allows for more flexibility and image manipulation. If you shoot in RAW, then always use the histogram. Digital camera manufacturers use JPG to save internal memory space when processing an image.
-
The ambient light may not be a true reflection of the lighting conditions you are seeing in the preview LCD of your digital camera. The LCD screen could be dimmed or too bright, so it can miss leading and cause the photographer to think they have the correct exposure. Whilst being under or overexposed in reality.
-
If shooting in one of the auto modes (Aperture priority, Shutter priority, Program mode) you have a specific picture style setting, preset into your camera which may influence the overall image character and visual lighting conditions within your image. Thus not giving a real and true indication of the actual lighting conditions. Or falsifying the existing data info readings.
-
You may have the wrong white balance set within your camera. This can throw true lighting exposure levels off, and give an incorrect reading.
-
In manual mode, you may just be exposing incorrectly, as a result of using the live view on the back of your camera's LCD screen and not the actual exposure indicator through the viewfinder to compose and obtain the correct exposure.
-
The LCD screen on the back of your camera is uncalibrated, so it isn't giving you a true indication of your light levels if you are only looking at an image on the LCD screen to verify if you have obtained the correct exposure.
The modern digital camera, 2017 and onwards, now have the ability to live preview the histogram whilst obtaining the correct exposure and composition. This saves a lot of time and eliminates the process of having to take a test shot, then preview the image on the LCD screen and then pull up the histogram to verify if the exposure is correct. Before, actually taking another shot once the correct exposure has been obtained. Using a histogram will save you time and take you to the next level in your photography. It will enhance the colour tones within your image and allow you to experiment and develop your own style. Basically, the histogram allows a photographer to see if there are any problems with their exposure. So why wouldn't you use it?


How do you read a histogram?
The modern digital camera is able to read the quality of light it receives by means of the built-in light meter within its sensor. The light that reaches the sensor is broken down according to the level and quality of its tonal range. And this mainly depends on the light conditions in which the photographer has taken an image in.
The sensor then groups these different qualities of individual specs of light according to their own specific tonal range. The individual specs of light are read by the internal sensors- pixels and grouped according to how many are present for each specific tonal range (light quality). The grouping and allocation of these different tonal range groups are what the histogram represents. So the greater the sensor the better its capabilities are of analysing different light strengths, qualities and tonal ranges.
The horizontal x-axis on the histogram represents the luminance - tonal range (quality of light). And the vertical y-axis represents the number of pixels per each individual tonal range. The right side represents the highlights or bright areas whilst the left side represents the blacks and shadows. The middle section is where the mid tones and 18% grey are represented. The height at which the peaks reach represents the number of pixels in a particular tonal range.
Each tonal range is broken down according to there own specific light quality from 0-255 (0 being black and 255 being white). After previewing an image and pulling up the histogram, we are then able to verify in which tonal range most of the pixels lie according to the lighting condition the images were captured in. The histogram (digital light meter) will indicate whether an image is overexposed, underexposed or has been taken at the correct exposure. It gives an accurate indication of the quality of light reaching the sensor. And it guides the photographer on how much light is required by the sensor to obtain perfect exposure.
The histogram is covered in more detail here: Click here The digital photography course (2019)


To illustrate and analyse what exposure is. Please refer to the image on the left of a windmill water pump, with a water reservoir tank.
The image was captured with perfect exposure.
The red arrow indicates where we will be conducting the analyses.
As light is hitting the water reservoir tank from the right. I have chosen the water overflow bracket on this side of the reservoir to focus our attention so that we can break down and understand how this exposure was achieved. As a lot of light is hitting this side compared to the rest of the water tank which seems to be in the shade.
The image on the left is of a water reservoir overflow bracket. On closer inspection, we can see only a black dot. Sunlight is hitting the right side of the water reservoir cement wall at a 45-degree angle. Indicating that the image was captured at about midday on a hot summer afternoon.
So we know the lighting condition was perfect for the photographer.
The images below, allow us to examine what would happen to this same image if we were to deliberately under or overexpose it. We examine what the histogram would look like for each. And to clarify and eliminate any doubt. We have zoomed in to the water overflow bracket at 3200% to inspect what happens to the pixels at each exposure setting.
%2BHistograms.jpg)


To obtain a perfect exposure, like in the image on the left. The photographer has either used Aperture priority and then used the exposure compensation to move the slider so that it is neither underexposed or overexposed but perfectly in the middle of the exposure slider. Or the photographer has used the Manual mode, with a low ISO at about 100 or 200, there is a great depth of field, so perhaps they have used an Aperture of about f/11 or f/16 at a shutter speed of 250 or 500 sec. The luminance histogram shows spikes in the shadows and the highlights and low levels of mid tones. The RGB, particularly the Red has a high spike in the shadows, whilst the Green is similar to the luminance. The blue has both a spike in the shadows and a slightly high peak in the highlights. The pixel data shows great RGB and luminance.


To create this underexposed image. The photographer has either used Aperture priority and then used the exposure compensation to move the slider to the left to pull the light out of the image. Or the photographer has used the Manual mode, with a low ISO at about 100 or 200, there is a great depth of field so, perhaps they have used an Aperture of about f/22 at a much faster shutter speed of about 1000 sec. The luminance histogram shows a huge spike to the left where the dark tonal range lies, there are slight shadows and very low highlights and really low mid-tone levels. The RGB, particularly the Red has a high spiked to the left, whilst the Green is similar to the red. The blue has both a spike in the left "dark area" and slightly peaks in the highlights to emphasize dark blue to light blue in the sky. The pixel data only shows RGB and zero data capture in certain area's. Particularly, the dark area's. Clipping will occur in this image.


To create this overexposed image. The photographer has either used Aperture priority and then used the exposure compensation to move the slider to the right to add more light into the image. Or the photographer has used the Manual mode, with a high ISO at about 400, there is not much depth of field so, perhaps they have used an Aperture of about f/5.6 at a much slower shutter speed of about 125 or 250 sec. The luminance histogram shows a huge spike to the right where the pure white tonal range lies, there is a low level of shadows and very low highlights and really low mid-tone level. The RGB, particularly the Red has a high spiked to the right as well, whilst the Green is similar to the red. The blue has spiked to the right as well, and there are slight peaks in the highlights to emphasize light blue in the top left corner. The pixel data shows both luminance & RGB with a zero data capture in certain area's. Particularly, the white blown out area's. Clipping will occur in this image.


The histogram allows a photographer to see if there are any problems with there exposure. The majority of good exposure as we have seen above lies within the centre of the histogram. And what we have seen when we deliberately underexposed and overexposed an image, it can make it darker or whiter than its true representation.
Your camera's light meter may in certain circumstances when photographing a predominately black image, push the light meter to expose for 18% grey and the black areas will appear grey. When in fact they should be pitch black. And the same could happen for pure white images when the camera's light meter will override the exposure and expose for 18% mid-grey. And all your images with a white dominance present is now turned to grey. So how do we fix this?
Firstly if you are shooting in JPG and have your images saved in JPG, this grey cast will be applied "embedded and saved into all your images. When you try and correct the colour grey cast issue later in the editing process. You will find that you will struggle and in most situations, most editing software won't let you edit a JPG. As the data information has been compressed internally within the camera.
In Raw, if you forget to check the histogram and a few of your images have a grey cast. You know you have the flexibility to go into the image data and fix the exposure later in the editing process. But this also may not be that great. Because you may have a perfect exposure with an image with no detail or contrast. And you may have to dodge and burn certain section to bring back the detail.
If your camera's dynamic range is between the blacks and whites on the histogram, we can generally fix the exposure in editing. If the data of light information fall outside this range "known as clipping" we have no data information to work with and thus no exposure. That's basically the main reason for using the histogram. You want your image to have all the right light information in the dynamic range area for your camera's sensor to capture the data.
If you find that the image on the back of your camera is way off true black or white of the subject/scene you are photographing. You should use the histogram in conjunction with the exposure compensation mode (only in one of the auto modes) to reset the colour to its true representation. In one of the auto modes like "Aperture or Shutter priority," you would use the exposure compensation to brighten an image by moving the slider to the right (+) so that you can deliberately overexpose the image by pushing more light into areas within the image that require more light. And we would do the same thing if we want to darken an image. The photographer would move the slider to the left (-) to pull the light out of the image if the image appeared way too white and bright. Depending on the light conditions, the exposure compensation meter slider should be directly in the middle to obtain perfect exposure under normal lighting conditions.
In manual mode, there is no exposure compensation indicator slider. All exposure will need to be obtained by the ISO, Aperture and Shutter speed working in conjunction with the white balance whilst staying within the dynamic range of the light meter and sensors capabilities to obtain perfect exposure.


Clipping
"no data captured"
Clipping
"no data captured"
Camera dynamic range =
Tonal range + number of pixels
Digital sensor
This area moves according to your choice of exposure compensation, ISO, Aperture, Shutter speed and lighting used (Ambient, Artificial, Strobe, flash), White balance


White light is made of colour


To conclude, I hope that this basic understanding of the histogram will assist you to capture perfect exposed images. The histogram is an aid and a guide which allows you to see and verify if there are any problems with your exposure.
In next months edition. We will be looking into "What is Dynamic Range" and how this can influence our exposure. Once this has been mastered, we will then delve into how to create "High and Low key images" using the histogram as our main guide with an external light meter.
This tutorial may not apply to photographers who have the new updated live view histogram on their camera.
